


Laboratories are high-pressure environments where accuracy and efficiency can mean the difference between success and failure. Whether you’re a pharmaceutical researcher or an academic, reliable tools make all the difference. Among the most important tools in any lab are laboratory dispensers, which offer accurate, precise, and repeatable liquid handling for various applications. If you want to streamline workflows and increase productivity, a high-precision bottle top dispenser is an important investment.
This post breaks down the features, uses, and calibration processes of these indispensable tools so that you get the most out of them.
Table of Contents
- What Makes a Laboratory Dispenser Essential?
- Key Benefits of Laboratory Dispensers are:
- The Role of a Bottle Top Dispenser
- How to Set Up a Bottle Top Dispenser?
- Calibration is The Key to Accuracy
- DIY Calibration Guide for Bottle Top Dispensers:
- Best Practices for Calibration
- Maintenance Tips to Keep Your Dispenser in Top Shape
- Advanced Features to Look For
- How Can Dispensers Improve Laboratory Productivity?
- Choosing the Right Dispenser for Your Needs
- Conclusion
What Makes a Laboratory Dispenser Essential?
A laboratory dispenser is designed to deliver exact liquid volumes. Dispensers offer repeatable results, making them ideal for tasks requiring precision.
Key Benefits of Laboratory Dispensers are:
- Time-Saving: No need for repetitive measurements. Set the volume and dispense in seconds.
- Accuracy: Eliminate variability caused by manual errors.
- Safety: Reduced handling of hazardous liquids assures fewer risks.
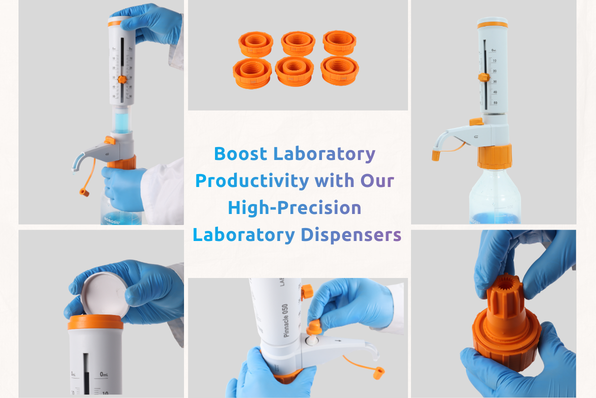
The Role of a Bottle Top Dispenser
A bottle top dispenser attaches directly to reagent bottles, offering convenience and precision in liquid handling. It simplifies tasks like reagent preparation and repetitive dispensing, which is essential for labs dealing with high volumes. Some of the most common features that stand out are:
- Direct Attachment: Fits securely onto reagent bottles, minimising spills.
- Adjustable Volumes: Allows flexible dispensing based on experimental needs.
- Easy Maintenance: Threaded joints offer leak-free operations and effortless cleaning.
These dispensers are especially useful in labs handling corrosive or viscous liquids, as their materials are designed to resist chemical reactions.
Also Read


How to Set Up a Bottle Top Dispenser?
Setting up a bottle top dispenser is simple, but attention to detail gives you optimal performance. Follow these steps:
- Attach the Dispenser: Secure the dispenser onto the reagent bottle using the appropriate threaded joint. Ensure a tight seal to prevent leaks.
- Prime the System: Dispense a few volumes to remove any air bubbles. This gives you consistent results during the actual process.
- Set the Volume: Use the calibration knob to select the desired volume. Make sure you cross-check the settings with your calibration report.
Calibration is The Key to Accuracy
Calibration makes sure your dispenser delivers the exact volume displayed. Environmental conditions, liquid viscosity, and regular wear can impact its performance, making periodic calibration essential.
DIY Calibration Guide for Bottle Top Dispensers:
- Preparation: Use distilled water (as per ISO 3696 standards) at 20°C and an balance with recommended accuracy.
- Set the Nominal Volume: Adjust the dispenser to 100%, 50%, or 10% of its maximum dispensing capacity, depending on your requirement.
- Perform Gravimetric Testing:
- Dispense ten full volumes into a reservoir on the balance.
- Calculate the mean weight using the formula: (w1+w2+w3+…+w10)/10
- Convert weight to volume using the Z-factor (accounting for water density and air buoyancy).
- Adjust Calibration Knob: Turn the knob clockwise to decrease volume or anticlockwise to increase it.
- Re-Test: Repeat the gravimetric test to confirm accuracy.
Best Practices for Calibration
Frequency: Calibrate every 6-12 months, depending on usage and environmental conditions. Always recalibrate after cleaning or autoclaving.
Tips for Accurate Results:
- Make sure the calibration knob starts at the “zero” position as specified in your calibration report.
- Work in a controlled environment to minimise temperature and humidity effects.
- Regular calibration not only ensures reliable dispensing but also extends the life of your dispenser.
Maintenance Tips to Keep Your Dispenser in Top Shape
Like any tool, a dispenser performs best when maintained properly. Routine cleaning and occasional repairs prevent issues like leaks or clogs. The best way to maintain such an instrument includes the following:
- Cleaning: Follow the built-in cleaning guide for sediment removal. Use compatible cleaning agents to avoid damaging internal parts.
- Inspect Seals and Joints: Check threaded joints for wear. Replace damaged seals promptly.
- Lubrication: If recommended, lightly lubricate moving parts to reduce friction and wear.
Advanced Features to Look For
When selecting a dispenser, modern features enhance usability and reliability. You may find advanced Bottle Top Dispensers from leading brands like Borosil Scientific. Here are the key features you need to look out for:
Smart Design:
- Easy-to-read displays showing volume settings.
- Digital alerts for recalibration or errors.
Safety Mechanisms:
- Auto shut-off systems that protect against overheating or feed water disruptions.
- Durable materials are resistant to chemicals and thermal stress.
These advanced features reduce downtime and improve lab productivity, making them a worthwhile investment.
How Can Dispensers Improve Laboratory Productivity?
Efficiency is everything in a lab. A high-precision laboratory dispenser saves time, reduces errors, and enhances safety. Instead of manually measuring liquids, which is tedious and prone to mistakes, dispensers allow you to focus on more critical tasks.
- Time Savings: Automated volume settings eliminate repetitive measurements. Faster dispensing means quicker experiment setups.
- Accuracy: Consistent volume delivery reduces the need for repeats or adjustments. This minimises the waste of costly reagents or chemicals.
Choosing the Right Dispenser for Your Needs
Not all dispensers are the same. Picking one that aligns with your lab’s requirements offers optimal performance.
- Volume Range: Make sure the dispenser supports the volumes you typically work with.
- Chemical Compatibility: Check if the dispenser materials can handle the reagents you use.
- Ease of Calibration: Look for models with user-friendly calibration features.
For instance, if your lab handles both aqueous and viscous solutions, opt for a dispenser designed to handle a wide range of viscosities.
Conclusion
Pairing a bottle top dispenser with proper maintenance and calibration ensures reliable performance for years, making it a cornerstone of any well-equipped lab. Upgrading your dispenser setup can help improve efficiency and reduce errors.

